生成器函数(一)
生成器初识
生成器函数使用 function* 语法,返回一个生成器(迭代器),允许定义一个非连续执行的函数作为迭代算法。
生成器初次调用时,不会执行代码,而是返回一个生成器对象。通过调用 next() 方法逐步执行,直到遇到 yield 关键字为止。每次调用都返回一个生成器对象(每个生成器只能迭代一次)。
以下是通过生成器编写的简单迭代器示例:
function* testIterator(start = 1, end = 5) {
  let count = start;
  for (let value = start; value < end; value++) {
    count++;
    yield value;
  }
  return count;
}
const customItertor = testIterator();
for (const index of Array(7)) {
  console.log(customItertor.next());
}
在此例中,生成器按 yield 的顺序逐步执行,返回每次的值。for 循环调用 next(),每次执行到 yield 后停止,直到完成全部迭代。
生成器函数(二)
生成器函数调用时会产生一个生成器对象,通过调用 next() 方法逐步执行。因为生成器对象是特殊的迭代器,它实现了 Iterator 接口。本文将进一步讲述生成器的用法。
目录
- 返回值是什么
- 如何传参
- 如何提前结束
- 委托执行
- 场景示例一:将原生对象改造为可迭代对象
- 场景示例二:遍历自定义类的键值
- 下节预告
返回值是什么
生成器是特殊的迭代器,按 yield 逐步执行,返回的值格式与迭代器相同。value 为 yield 后的表达式值,直到遇到 return。当 done 为 true 后,后续的 yield 不会再执行,调用 next() 时返回 { value: undefined, done: true }。
function* customGenerator() {
  console.log('开始执行');
  yield 'a';
  let count = 0;
  yield count + 2;
  return 'b';
  yield count;
}

console.log('第一次调用');
const testGenerator = customGenerator();

console.log('开始调用next()方法');
for (const index of Array(4)) {
  console.log(testGenerator.next());
}
初次调用生成器时,返回生成器对象,只有调用 next() 后,生成器才开始逐步执行。
如何传参
在生成器的每步执行中,可以通过 next() 方法传递参数,并赋值给 yield 左侧的变量。这意味着在每次调用 next() 时,会从上一个 yield 处继续执行。
function* customGenerator() {
  const value1 = yield 'a';
  console.log('value1:', value1);
  let count = 0;
  const value2 = yield count + 2;
  console.log('value2:', value2);
  return 'b';
}

const testGenerator = customGenerator();
for (const index in Array.from({ length: 4 })) {
  const count = +index + 1;
  console.log(`第${count}次调用next方法:`);
  console.log(testGenerator.next(count));
}
第一次调用 next() 通常不传参。如果需要传参,可以在创建生成器时传入:
function* customGenerator(value0) {
  console.log('value0:', value0);
  const value1 = yield 'a';
  console.log('value1:', value1);
  let count = 0;
  const value2 = yield count + 2;
  console.log('value2:', value2);
  return 'b';
}

const testGenerator = customGenerator('第一个参数');
for (const index in Array.from({ length: 2 })) {
  const count = +index + 1;
  console.log(`第${count}次调用next方法:`);
  console.log(testGenerator.next(count));
}
如何提前结束
return
通过 return() 方法,可以提前结束生成器。done 变为 true,并返回 return() 传入的值。
function* customGenerator() {
  const value1 = yield 'a';
  console.log('value1:', value1);
  const value2 = yield 'b';
  console.log('value2:', value2);
  return 'c';
}

const testGenerator = customGenerator();
for (const index in Array.from({ length: 4 })) {
  const count = +index + 1;
  console.log(`第${count}次调用:`);
  if (count === 2) {
    console.log(testGenerator.return(count));
  } else {
    console.log(testGenerator.next(count));
  }
}
throw
也可以通过 throw() 方法向生成器抛出异常,从而提前结束生成器。
function* customGenerator() {
  try {
    const value1 = yield 'a';
    console.log('value1:', value1);
    const value2 = yield 'b';
    console.log('value2:', value2);
    return 'c';
  } catch (error) {
    console.log('捕获到异常:', error.message);
  }
}

const testGenerator = customGenerator();
for (const index in Array.from({ length: 4 })) {
  const count = +index + 1;
  console.log(`第${count}次调用:`);
  if (count === 2) {
    console.log(testGenerator.throw(new Error(`第${count}次调用异常`)));
  } else {
    console.log(testGenerator.next(count));
  }
}
委托执行
生成器函数可以通过 yield* 将执行委托给另一个生成器函数:
function* generatorA() {
  yield 'x';
  yield 'y';
  yield 'z';
}

function* customGenerator() {
  yield 'a';
  yield 'b';
  yield* generatorA();
  yield 'c';
  return '完成';
}

const testGenerator = customGenerator();
for (const index in Array.from({ length: 7 })) {
  const count = +index + 1;
  console.log(`第${count}次调用:`, testGenerator.next());
}
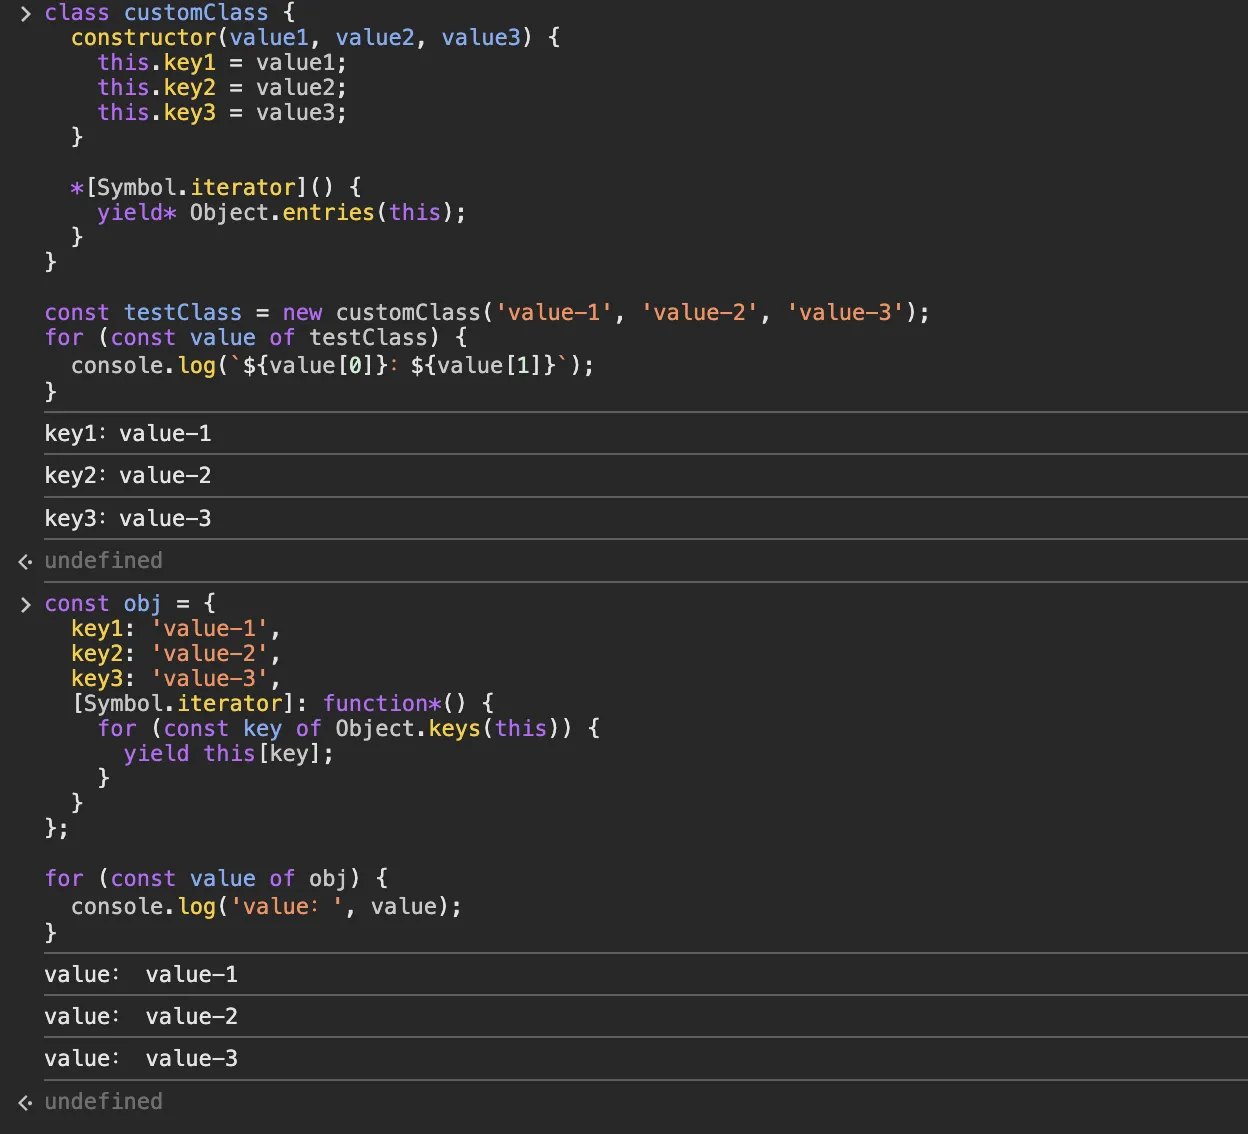
场景示例一:将原生对象改造为可迭代对象
通过生成器可以轻松将对象改造为可迭代对象:
const obj = {
  key1: 'value-1',
  key2: 'value-2',
  key3: 'value-3',
  [Symbol.iterator]: function*() {
    for (const key of Object.keys(this)) {
      yield this[key];
    }
  }
};

for (const value of obj) {
  console.log('value:', value);
}
场景示例二:遍历自定义类的键值
class customClass {
  constructor(value1, value2, value3) {
    this.key1 = value1;
    this.key2 = value2;
    this.key3 = value3;
  }

  *[Symbol.iterator]() {
    yield* Object.entries(this);
  }
}

const testClass = new customClass('value-1', 'value-2', 'value-3');
for (const value of testClass) {
  console.log(`${value[0]}:${value[1]}`);
}